| State |
City |
Organization |
Project |
|
California
|
|
|
|
| |
Brentwood |
B Walker Ranch |
Fence building and additional maintenance |
| |
Clayton |
Contra Costa Animal Shelter |
| |
Cloverdale |
Cloverdale Senior Center |
Working on yard cleanup, and other projects at Cloverdale Senior Center |
| |
Del Mar |
Casa de Amparo Children's Home |
| |
El Sobrante |
B Walker Ranch |
Fence building and additional maintenance |
| |
Fallbrook |
Casa de Amparo Children's Home |
| |
Morgan Hill |
Local Foodbank |
Gathering and sorting donations |
| |
Palm Desert |
SafeHouse of the Desert |
| |
Palm Desert |
SafeHouse of the Desert |
| |
Redding |
Shasta County Child Abuse Prevention Coordinating Council |
| |
Salinas |
Local Foodbank |
Gathering and sorting donations |
| |
San Diego |
Casa de Amparo Children's Home |
| |
Vacaville |
B Walker Ranch |
Fence building and additional maintenance |
| |
Walnut Creek |
B Walker Ranch |
Fence building and additional maintenance |
| Colorado |
|
|
|
| |
Centennial |
Habitat for Humanity of Metro Denver |
| |
Fort Collins |
Partners Mentoring Youth – Fundraiser; Crossroads Safehouse |
Clean up grounds/yards |
| |
Denver |
Action Center of Jefferson County |
| Hawaii |
|
|
|
| |
Kailua-Kona |
Salvation Army |
Refurbishing teen housing |
| |
Kamuela |
Salvation Army |
Refurbishing teen housing |
| Idaho |
|
|
|
| |
Caldwell |
Boise VA Hospital |
Clean up grounds |
| |
Coeur d'Alene |
The Children's Village |
Multiple projects |
| |
Hayden |
The Children's Village |
Multiple projects |
| |
Lewiston |
Community Action Partnership |
Planting flowers, yard work and general cleanup |
| |
Moscow |
Community Action Partnership |
Planting flowers, yard work and general cleanup |
| |
Post Falls |
The Children's Village |
Multiple projects |
| Montana |
|
|
|
| |
Helena |
The Holter Gala |
|
| Oregon |
|
|
|
| |
Albany |
Community Outreach |
Volunteering at Children's Day |
| |
Ashland |
ACCESS in Medford |
Food drive |
| |
Bend |
Grandma's House Women's Shelter |
Landscaping and tearing down an old shed on the property |
| |
Cannon Beach |
Cannon Beach/Gearhart |
Cleaning up the beaches and coastline |
| |
Charbonneau |
Community Warehouse in Tualatin |
Yard cleanup and indoor organization |
| |
Clatskanie |
Local Foodbank & Fairview Cemetary |
Collecting donations and money for local food bank, and cleaning up the grounds at Fairview Cemetery in Scappoose |
| |
Commercial- Lane County |
Food for Lane County, Grassroots Garden |
Weeding, moving material, planting and tending garden |
| |
Commercial- Redmond |
REACH (formerly OR Boys and Girls Club) |
Minor repair, painting, weeding, cleaning, etc. |
| |
Corvallis |
Community Outreach |
Volunteering at Children's Day |
| |
Eagle Point |
ACCESS in Medford |
Food drive |
| |
Eugene |
Food for Lane County, Grassroots Garden |
Weeding, moving material, planting and tending garden |
| |
Eugene North |
Food for Lane County, Grassroots Garden |
Weeding, moving material, planting and tending garden |
| |
Florence |
Food for Lane County, Grassroots Garden |
Weeding, moving material, planting and tending garden |
| |
Gearhart |
Food for Lane County, Grassroots Garden |
Weeding, moving material, planting and tending garden |
| |
Happy Valley |
Oregon Food Bank |
Collecting and sorting donations |
| |
Hillsboro |
HomePlate Youth Services |
Working at charity kickball tournament fundraiser |
| |
Hood River |
Multiple projects |
Senior Services and school districts in the gorge/charity golf tournament in July |
| |
Hood River- Oak Street |
Gorge/charity golf tournament in July |
Multiple projects to benefit Senior Services and school districts |
| |
Jacksonville |
ACCESS in Medford |
Food drive |
| |
Lake Oswego |
Tualatin Community Food Pantry |
Organizing and restocking |
| |
Lake Oswego – West |
Northwest Children's Outreach |
Collecting and sorting donations |
| |
McMinnville |
Helping out a local family with yard and house needs |
| |
Medford |
ACCESS in Medford |
Food drive |
| |
Community Realty- Oregon City |
OR Humane Society |
Collecting donations |
| |
Portland Heights |
Community Warehouse |
Sorting, cleaning, and helping |
| |
Portland- HOLLYWOOD |
OR Humane Society |
Collecting donations |
| |
Portland- Lloyd Tower NE |
Head Start program |
Cleaning and prepping used books for gifts to children |
| |
Portland- Moreland |
SnowCap Community Charities |
Shredding, cleaning and variety of other projects |
| |
Portland- North |
Astor Elementary School |
Yard cleanup |
| |
Portland- NW Johnson |
Rigler Elementary |
Purchase, bag and deliver school supplies |
| |
Portland- Raleigh Hills |
Hopewell House Hospice |
Clean out flowerbeds, plant flowers and plants, and trim bushes |
| |
Pearl District |
Rigler Elementary |
Purchase, bag and deliver school supplies |
| |
Property Management- Corvallis |
Community Outreach |
Volunteering at Children's Day |
| |
Property Management- Gorge |
Gorge/charity golf tournament in July |
Multiple projects to benefit Senior Services and school districts |
| |
Property Management- Portland |
Astor Elementary School |
Yard cleanup |
| |
Property Management- PDX Metro |
Astor Elementary School |
Yard cleanup |
| |
Redmond |
REACH (formerly OR Boys and Girls Club) |
Minor repair, painting, weeding, cleaning, etc. |
| |
Salem |
Marion Polk Food Share |
Sorting food and working in the community garden |
| |
Sandy |
Highway 26 |
Cleanup |
| |
Scappoose |
Local Foodbank & Fairview Cemetary |
Collecting donations and money for local food bank, and cleaning up the grounds at Fairview Cemetery in Scappoose |
| |
Seal Rock |
Seashore Family Literacy Center |
Working on community garden |
| |
Shady Cove |
Upper Rogue Community Center |
Collecting food donations |
| |
Branch Support- Stellar |
Rigler Elementary |
Purchase, bag and deliver school supplies |
| |
St. Helens |
Local Foodbank & Fairview Cemetary |
Collecting donations and money for local food bank, and cleaning up the grounds at Fairview Cemetery in Scappoose |
| |
Sunriver |
Local Foodbank & Fairview Cemetary |
Collecting donations and money for local food bank, and cleaning up the grounds at Fairview Cemetery in Scappoose |
| |
The Dalles |
Gorge/charity golf tournament in July |
Multiple projects to benefit Senior Services and school districts |
| |
Vida |
Food for Lane County, Grassroots Garden |
Weeding, moving material, planting and tending garden |
| Washington |
|
|
| |
Aberdeen-Grays Harbor |
Coastal Harvest Distribution Center (division of NW Harvest) |
Bagging bulk food for distribution |
| |
Allyn/Hood Canal South |
Foodbank of North Mason County |
Working on elementary school garden that provides food to food bank |
| |
Anacortes |
Local Women's Shelter |
Helping clean and set up a new addition |
| |
Arlington |
Centennial Park |
Planting trees and shrubs, landscaping and cleaning up |
| |
Auburn- Lakeland Hills |
Auburn Foodbank |
Multiple projects |
| |
Belfair |
Foodbank of North Mason County |
Working on elementary school garden that provides food to food bank |
| |
Bellevue |
Kelsey Creek Farm |
Painting, gardening and cleaning |
| |
Bellevue Commons |
Little Bit Therapeutic Riding Center |
Painting, cleaning, planting flowers and working on fences |
| |
Property Management- Bellevue |
Cougar Mountain Zoo in Issaquah |
Multiple projects |
| |
Bellevue South |
Mamma's Hands–house for women and children in crisis |
Painting, building a deck and yard work |
| |
Bellevue West |
Acres of Diamonds home |
Painting apartments and the main house, cleaning, repairing and landscaping |
| |
Bingen |
Gorge/charity golf tournament in July |
Multiple projects to benefit Senior Services and school districts |
| |
Bonney Lake- Lake Tapps |
Bonney Lake Senior Center |
Yard work |
| |
Burien |
Jacob Ambaum Park and Lake Burien Park |
Spreading wood chips and doing cleanup at the playgrounds |
| |
Camano Country Club |
Windermere Soap Box Derby |
| |
Camano Island Terry's Corner |
Windermere Soap Box Derby |
| |
Cathlamet |
Lower Columbia School Gardens |
Weeding, pruning, planting, etc. |
| |
Commercial- Everett |
Volunteers of America Everett Food Bank |
Sorting through donated food, stacking, organizing, etc. |
| |
Commercial- Lake Stevens |
Multiple projects |
Beautifying Lundeen Park on Lake Stevens, and doing a fundraiser for a local food bank |
| |
Edmonds |
Hickman Park |
Landscaping and maintenance |
| |
Property Management- Edmonds |
Cougar Mountain Zoo in Issaquah |
Multiple projects |
| |
Entiat |
Teams Learning Center |
Landscaping and working on the playground |
| |
Federal Way |
Federal Way Food Bank and Senior Center |
Multiple projects |
| |
Gig Harbor |
Fish Food Bank |
New signage, landscaping, cleanup, etc |
| |
Gig Harbor- Downtown |
Fish Food Bank |
New signage, landscaping, cleanup, etc |
| |
Gig Harbor- Professional Partners |
Fish Food Bank at Gig Harbor Peninsula |
Sorting donations and restocking shelves |
| |
Issaquah |
Mountains to Sound Greenway Trust |
Creek restoration, planting, removing invasive species at Issaquah Creek |
| |
Kelso/Longview |
Lower Columbia School Gardens |
Weeding, pruning, planting, etc. |
| |
Kettle Falls |
Fun Run event |
Cleaning up area before, during and after and assisting |
| |
Kirkland |
Houghton Beach Park |
Landscaping and repairs |
| |
Property Management- Kirkland |
Compass Housing Alliance in Bothel |
Landscaping and other housing maintenance |
| |
Lake Chelan |
Habitat for Humanity project |
Multiple projects |
| |
Lake Stevens |
Multiple projects |
Beautifying Lundeen Park on Lake Stevens, and doing a fundraiser for a local food bank |
| |
Leavenworth |
Teams Learning Center |
Landscaping and working on the playground |
| |
Lynnwood |
Martha Perry Garden |
Making garden beds, weeding, planting, for food bank garden |
| |
Maple Valley |
Local project |
Yard work and cleanup for local family that's holding a big graduation party |
| |
Marysville |
City of Marysville |
Painting a fence at a park/trail |
| |
Mercer Island |
East Side Baby Corner in Issaquah |
Organizing, cleaning and prepping items |
| |
Mill Creek |
Habitat for Humanity store in Lynnwood |
Cleanup, painting, etc. |
| |
Mill Creek Town Center |
Habitat for Humanity store in Lynnwood |
Cleanup, painting, etc. |
| |
Monroe |
Senior Center in Monroe |
Multiple projects |
| |
Moses Lake |
Local event |
Free community shredding event for the public and food drive |
| |
Mount Vernon |
Habitat for Humanity's "Habitat Helpers" |
Working on repairs and cleaning at a local man's home |
| |
MoxiWorks |
Ryther House |
Repairing buildings, landscaping, cleaning, etc. |
| |
Port Orchard |
Helpline Food Bank |
Yard clean up and landscaping for an elderly resident in town and working on the community garden |
| |
Port Townsend |
Chimacum Senior Home |
Washing windows and gardening at a home for seniors and disabled people in Chimacum |
| |
Professional Development |
Solid Ground |
Clean up grounds |
| |
Pullman |
Community Action Partnership |
Planting flowers, yard work and general cleanup |
| |
Property Management- Pullman |
Community Action Partnership |
Planting flowers, yard work and general cleanup |
| |
Puyallup |
Tacoma Rescue Mission |
General repairs, also money and donations for the playground and other kids' needs |
| |
Redmond |
Friends of Youth |
Landscaping, weeding, planting and sorting donations |
| |
Windermere Referrals |
Solid Ground |
Clean up grounds |
| |
Renton |
Way Back Inn |
Painting, installing cabinets, and other minor repairs for displaced families organization |
| |
Renton- PSR |
Way Back Inn |
Painting, installing cabinets, and other minor repairs for displaced families organization |
| |
Seattle-Ballard |
St. Luke's Episcopal Church in Ballard |
Serving and packing food |
| |
Seattle-Capitol Hill |
Capitol Hill neighborhood |
Litter and garbage pick up |
| |
Seattle-Green Lake |
Neighborhood clean up |
Seattle Parks & Rec at Meridian Park and Adopt-a-Street on Ravenna Blvd NE |
| |
Seattle-Greenwood |
Multiple projects |
Split between Greenwood Senior Citizens Center and Greenwood Boys & Girls Club–tech support and yard work for seniors, and painting the gym and cleaning playground at B&GC |
| |
Seattle-Lakeview |
Neighborhood clean up |
Seattle Parks & Rec at Meridian Park and Adopt-a-Street on Ravenna Blvd NE |
| |
Seattle-Madison Park |
Multiple projects |
Neighborhood cleanup and traffic roundabout weeding in several neighborhoods |
| |
Seattle-Magnolia |
Community Event |
Shredding, recycling and collecting donations for Goodwill |
| |
Seattle-Mount Baker |
Wellspring |
Gathering donations for the Baby Boutique |
| |
Seattle-Northgate |
YWCA: Angeline's Day Center |
Setting up and serving two rounds of lunch to guests |
| |
Seattle-Northlake |
Grace Cole Nature Park |
Cleaning and weeding |
| |
Seattle-Northwest |
Bitter Lake Food Pantry |
Accepting and organizing donations |
| |
Seattle-Queen Anne |
Queen Anne Food Bank |
Organizing and collecting food |
| |
Seattle-Sand Point |
BLOCK Project on Beacon Hill |
Working on a sustainable home |
| |
Property Management- Seattle North |
Cougar Mountain Zoo in Issaquah |
Multiple projects |
| |
Property Management- Seattle |
Compass Housing Alliance in Bothell |
Landscaping and other housing maintenance |
| |
Seattle-Wall Street |
Mary's Place |
Counting, sorting and allocating donations |
| |
Seattle-Wedgwood |
Neighborhood clean up |
Cleaning up the local sidewalks and streets |
| |
Seattle-West Seattle |
Helpline |
Helping to set up Helpline's new neighborhood location–sorting clothing, installing carpeting, and refreshing parking area |
| |
Sedro-Woolley |
Habitat for Humanity's "Habitat Helpers" |
Working on repairs and cleaning at a local man's home |
| |
Sequim- East |
Sunbelt Apartments |
Removing and replacing old raised garden beds at a housing facility for homeless and disabled adults |
| |
Sequim- Sunland |
Sunbelt Apartments |
Removing and replacing old raised garden beds at a housing facility for homeless and disabled adults |
| |
Shelton |
Local project |
Home repair, carport repair project for office neighbor |
| |
Shoreline |
North Helpline Emergency Services and Food Bank |
Preparing emergency kits and sorting food donations |
| |
Silverdale |
Illahee State Park and Kitsap Lake |
Installing life jacket loaner boards |
| |
Snohomish |
Snohomish Food Bank |
Stocking shelves |
| |
Property Management- South |
Northwest Harvest in Kent |
Accepting and sorting donations |
| |
Spokane-City Group |
Family Promise of Spokane homeless shelter |
Working on deck, parking lot area, shelter, etc. |
| |
Spokane-Cornerstone |
Family Promise of Spokane homeless shelter |
Working on deck, parking lot area, shelter, etc. at Family Promise of Spokane homeless shelter |
| |
Spokane-Liberty Lake |
Family Promise of Spokane homeless shelter |
Working on deck, parking lot area, shelter, etc. at Family Promise of Spokane homeless shelter |
| |
Spokane-Manito |
Family Promise of Spokane homeless shelter |
Working on deck, parking lot area, shelter, etc. at Family Promise of Spokane homeless shelter |
| |
Spokane-North |
Family Promise of Spokane homeless shelter |
Working on deck, parking lot area, shelter, etc. at Family Promise of Spokane homeless shelter |
| |
Property Management- Spokane |
Family Promise of Spokane homeless shelter |
Working on deck, parking lot area, shelter, etc. at Family Promise of Spokane homeless shelter |
| |
Spokane-Valley |
Family Promise of Spokane homeless shelter |
Working on deck, parking lot area, shelter, etc. at Family Promise of Spokane homeless shelter |
| |
Stanwood |
Community event |
Windermere Soap Box Derby |
| |
Stevenson |
Gorge/charity golf tournament in July |
Multiple projects to benefit Senior Services and school districts |
| |
Tacoma-North |
Northwest Furniture Bank and Multicultural Child & Family Hope Center |
Various cleaning, gardening and organizing duties |
| |
Tacoma-Professional Partners |
Northwest Furniture Bank and Multicultural Child & Family Hope Center |
Various cleaning, gardening and organizing duties |
| |
Tacoma-University Place |
Northwest Furniture Bank and Multicultural Child & Family Hope Center |
Various cleaning, gardening and organizing duties |
| |
Tri-Cities Richland |
Summer Safety Day |
Free event for kids about bike safety, water safety, stranger danger, free helmets and life jackets |
| |
Tri-Cities Southridge |
Summer Safety Day |
Free event for kids about bike safety, water safety, stranger danger, free helmets and life jackets |
| |
Vancouver- Community Realty |
OR Humane Society |
Volunteering and collecting donations |
| |
Vancouver Metro |
Multiple projects |
Collecting donations for Fruit Valley Food Bank, and also doing a week long shred and recycle event at the office |
| |
Vancouver- Mill Plain |
Fruit Valley Elementary |
Food drive and shredding and recycling event |
| |
Vashon Island |
Sheepdog Classic in Vashon |
Working the ticket booth, beverage tent, and souvenir area at the Sheepdog Classic in Vashon–proceeds to Vashon Youth & Family Services and Partners in Education |
| |
Walla Walla |
Christian Aid Center and YWCA |
Restaining downtown benches, weeding and cleaning tree wells, and cleaning up a play area |
| |
Property Management- Walla Walla |
Christian Aid Center and YWCA |
Restaining downtown benches, weeding and cleaning tree wells, and cleaning up a play area |
| |
Wenatchee |
Teams Learning Center |
Improving the grounds and installing playground equipment |
| |
Westport |
Westport Community Garden |
Clean up, weed, plant, and beautify grounds |
| |
Whidbey Island- Coupeville |
Coupeville Elementary |
Working on wooded trail and grounds |
| |
Whidbey Island- Freeland |
Good Cheer Food Bank & Thrift |
Sorting donations, stocking shelves, and working on the garden |
| |
Whidbey Island- Langley |
Good Cheer Food Bank & Thrift |
Sorting donations, stocking shelves, and working on the garden |
| |
Whidbey Island- Oak Harbor |
Habitat for Humanity and the Toddler Learning Center |
Cleaning, organizing, etc. |
| |
Woodinville |
Wilmot Park |
Planting, cleanup, sod replacement, etc. |
| |
Yakima |
Yakima |
Food drive and shredding event at Veteran's coalition |
| |
Yarrow Bay |
Attain Housing |
Washing driveways, sidewalks, decks, and weeding, planting flowers and trimming trees |

 Facebook
 X
X
 Pinterest
 Copy Link
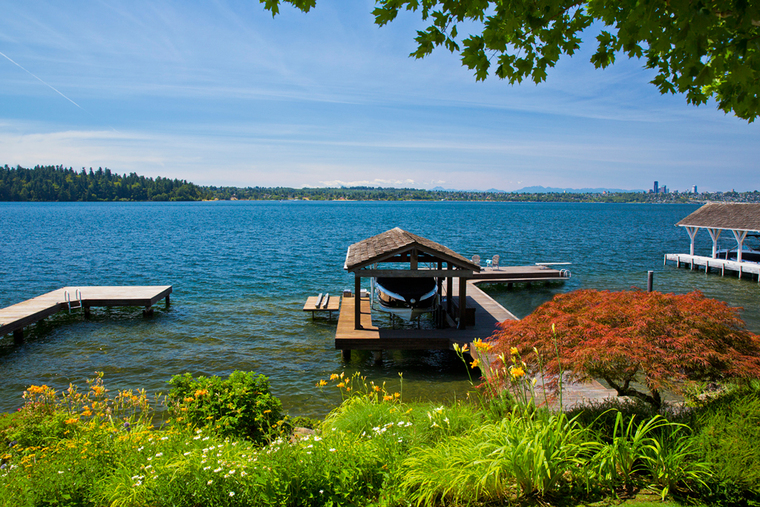
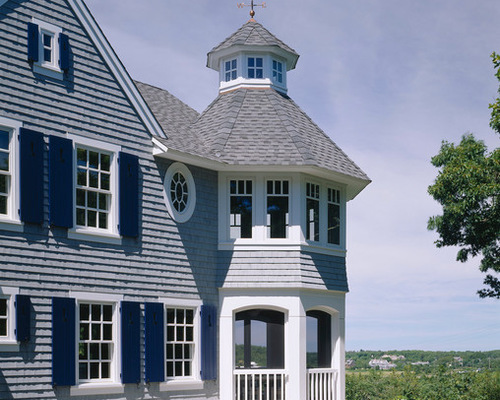
 Waterfront properties are subject to additional regulations and codes from various local, state and federal agencies. There are very strict regulations on shoreline development. If the property requires a new dock or bulkhead, it’s important to know that this can be a very challenging process given the multiple government agencies involved. These limitations are likely to get even more restrictive in the near future as the shoreline regulations are being updated. Sooner is better than later in applying for any permits related to docks, bulkheads and changes to the shoreline.
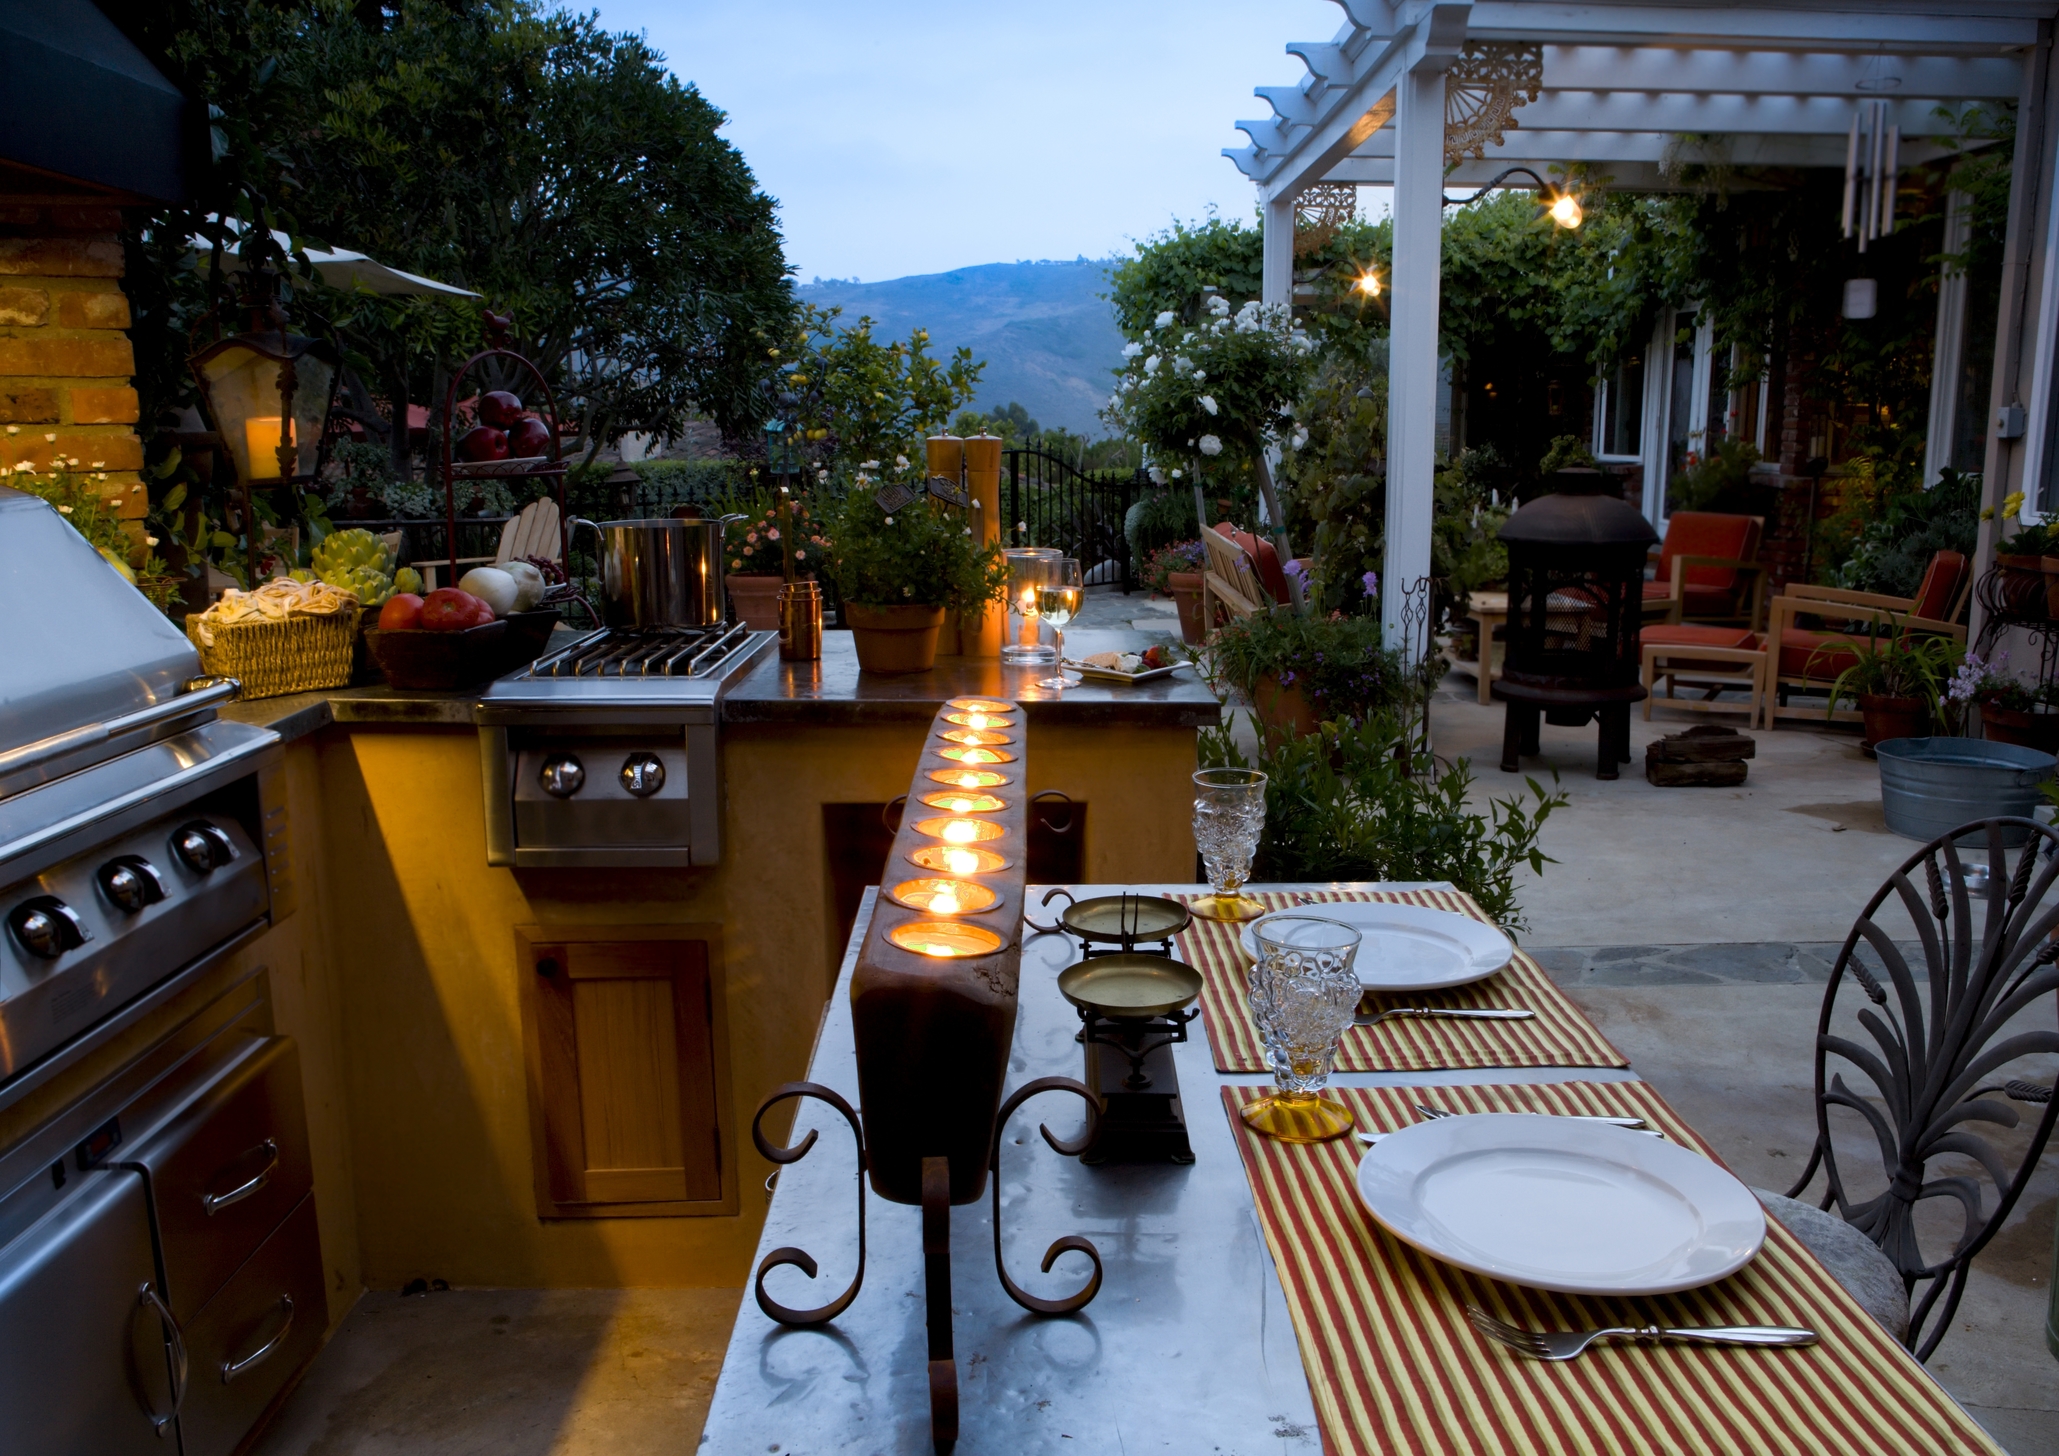
 Living on the water means that you have an additional set of factors to consider concerning your waterfront experience. For example, what is the boating traffic like in front of your home? Is it a busy channel or near a favorite fishing spot where boaters tend to congregate? Look closely at the properties of your waterfront neighbors: is there a tear-down next door so there will likely be a construction barge in front of you for the next few years? Does your neighbor have a huge yacht moored all summer that blocks your view? Is there a public beach nearby or community club that will cause noise late into the evenings?
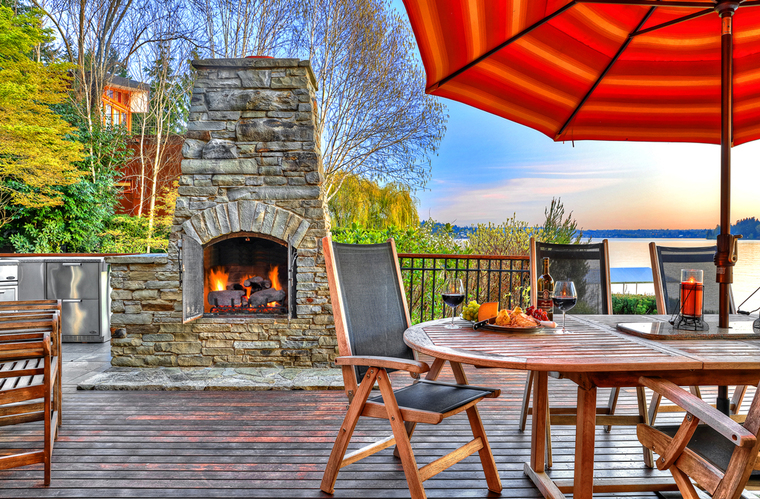


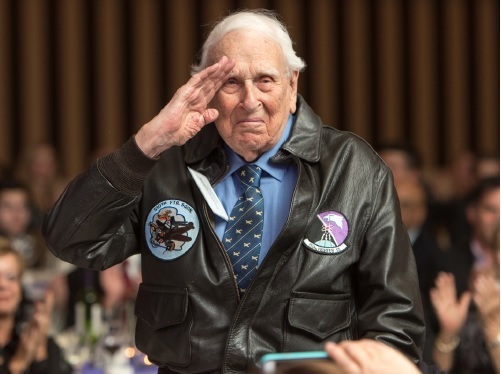 A little bit of history here: Ralph grew up in the Bryant area, attended Roosevelt High School and was the oldest living Alum of Roosevelt’s Golden Grads. He graduated from the University of Washington in Forestry. He entered WWII in 1943 and was stationed in England as a fighter pilot. He quickly became Squadron Commander of over 450 men, flying 129 missions. He won many honors during the war years, including The Silver Star Legion of Merit (three times), Distinguished Flying Cross (twice), Air Medal (24 times), Soldier’s Medal, and the French Croix de Guerre, and was recently recognized (with one other airman) as being the last surviving members of their squadron— thus they were awarded a bottle of brandy which had been set aside for such an occasion at the end of the war. In 1968 Ralph retired from the Air Force after 32 years of service and returned to Seattle with his wife, Wisteria (Tiero), and their five children, and joined Windermere Real Estate.


")


