
 Facebook
 X
X
 Pinterest
 Copy Link
Kitchen Remodel Must Haves
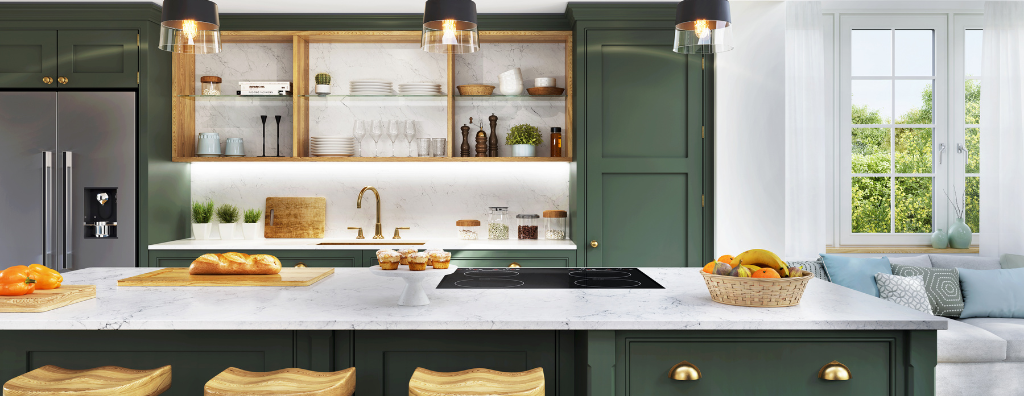
Many kitchen remodels are prompted by a desire for more storage, but there are plenty of reasons to want an upgrade. Whether your complaint is crowded counters, out-of-date appliances, or spending too much time cleaning up after a meal, there are ways to add functionality without sacrificing your aesthetic when you renovate your kitchen.
Storage
If you’re tired of finding expired food at the back of your lower cabinets or needing a step stool to reach items in the upper ones, roll-out cabinets and pantry shelves are a necessity. A roll-out garbage cabinet will keep trash and recycling cans out of sight (and smell). Be sure to use heavy-duty, reinforced hinges that can bear the weight of two, full cans.
Toasters, coffee makers, blenders, and air fryers can easily overcrowd kitchen counters. Appliance garages that hide away commonly used kitchen appliances now come in just about every configuration you can think of. If you love baking, you probably love your stand-up mixer even more. But moving it around can be a pain. Fortunately, installing a mixer riser into a lower cabinet is relatively simple and will put your favorite appliance right where you need it, only when you need it.
Cooking
Though some passionate cooks still swear by their gas ranges, induction cooktops have become all the rage for several good reasons. In addition to being easier to clean than gas stoves, induction cooktops are more efficient because all the heat they produce goes directly to your cookware rather than into the atmosphere of your home. And with inductor stoves, you never have to worry about dangerous fumes or open flames.
You don’t have to be an avid entertainer or the one who hosts Thanksgiving every year to reap the benefits from a double oven. Even cooking dinner for one or two people can be a challenge when you need to roast or bake things for different times or at different temperatures. A double oven fixes that, and it can improve efficiency if you prepare a dish using only the smaller oven since it takes less energy to heat up a smaller space. For extra user-friendliness, install the oven at counter height so you don’t have to bend over to pull out heavy dishes
Speaking of heavy… if your sink and cooktop are a bit distant from each other, a pot filler installed on the wall behind your stove could be a game changer. Say goodbye to heaving large pots of sloshing water across the kitchen!
For as long as microwaves have been around, people have wondered how to get them off their counters or make them appear more attractive. These days, microwave drawers are the new must-have kitchen upgrade. Instead of a door that swings open, the microwave is the entire drawer that slides out, and it can go in your kitchen island or along any cabinet wall.
Cleaning
Kitchen floors are notoriously difficult to keep clean. Between meal prep, quick snacks in front of the fridge, and near-constant traffic, crumbs and dust pile up quickly. If your home already has a central vacuum system, putting a vacuum slot in the kitchen makes clean ups a breeze. Simply sweep scraps into the slot—no more bending over with the dustpan. If you don’t have a central vacuum system, there are vacuum slot inserts on the market that use a traditional replaceable bag to collect what you sweep up.
If you’ve ever watched a mixologist or bartender shake up your cocktail and then place the shaker on top of a device that shoots up warm water to clean it, you’ve seen a glass rinser in action. Installing one in your own sink adds a touch of sophistication to your kitchen and makes cleaning glasses easier and more efficient, especially for those glasses that can’t go in the dishwasher or don’t fit on the top shelf.
It seems that a modern kitchen renovation isn’t complete until you’ve installed a large, single basin sink. There’s good reason for their increased popularity: more room to soak large dishes, easier to clean, etc. To really boost the usability of a single basin sink, consider adding hardware that makes it an efficient workstation. Drying racks, cutting boards, and colanders are readily available, easy to install, and will make your extra-large sink extra handy.
Toolbox Essentials for Homeowners

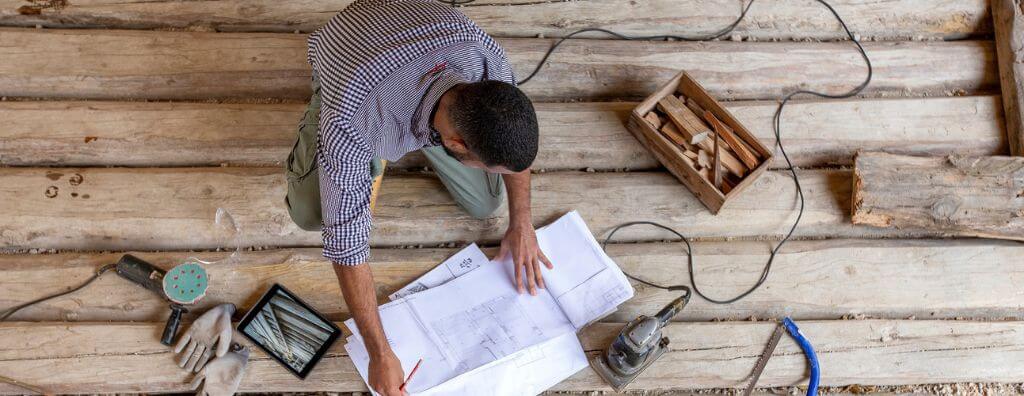
For all its perks—stability, tax breaks, building equity—being a homeowner comes with the responsibility of maintaining your home and the occasional repair. Some jobs require a professional, but if you are willing to take on minor repairs or DIY projects, you’ll need the right tools. Whether you’re starting a toolbox from scratch or looking to round out your tool collection, here are the basics every homeowner should have on hand.
Helpful hint: A toolbox filled with all or a few of these items makes a great housewarming, wedding, or graduation present.
Screwdrivers
You don’t need to own a home to know that a screwdriver is a life staple. From replacing batteries in toys to installing shelves on walls, owning a pair of quality screwdrivers—one flathead and one Phillips—is a must. Not many home projects call for extra small screwdrivers but having a set can be handy for fixing eye- and sunglasses.
Hammer
When you think of the word “tool,” a hammer likely comes to mind. Whether that’s because a pounding tool was likely humankind’s first invention or because you need one for nearly any type of handiwork, you’ll be glad you have a traditional claw hammer on hand.
Mallet
Like a hammer but with a rubber or wood surface, a mallet comes in handy when you need to drive wooden dowels or for more delicate projects that require a softer touch. The non-slip surface is also better for holding parts in place or applying pressure than the slippery metal edge of a traditional hammer.
Tape measure
You know the saying, “Measure twice, cut once”? It’s really good advice when it comes to DIY home projects, and a good tape measure makes the measuring part easier. Get one that is at least 25 feet long, with bold, easy-to-read numbers on both sides and that has a locking mechanism.
Utility knife
If all you do with a utility knife is open boxes, you’ll still use it quite frequently (given how often we all get deliveries of home goods these days). But there are tons of other uses for a very sharp item to cut with, including scoring wood or hanging wallpaper.
Wrench
There are a few ways to attach things to each other. Nails and screws have their place, which is why you need a hammer and screwdrivers. But nuts and bolts hold a lot of things together too, and for those you’ll need a wrench. Buying an adjustable one is not only more cost effective but it’ll save space in your toolbox.
Pliers
When you need leverage to tighten or loosen plumbing pipes or bolts, pliers can’t be beat. They can also help you hold things in place as well as bend or shape wire.
Level
When hanging pictures, mounting shelves, or needing to drill multiple holes in a line, you’ll need a level to keep you straight. And, yes, many of us have a level app on our mobile devices, but phones can be clunky and might not be reliable if you have a hard-shell case on your phone. A sturdy level isn’t expensive and can last a lifetime.
Wire cutters
How many of us have dulled a perfectly fine pair of kitchen shears cutting through cables or wires one too many times? (Just us?) Using high-quality wire cutters will not only save your scissors, but it will also ensure a cleaner cut through your wire or cable.
Cordless drill
Though screwdrivers are good for small jobs, a drill is better for screwing into harder surfaces or when the job calls for a lot of holes. Going cordless frees you from the need for extension cords, but spring for the extra battery pack so you always have one fully charged when you need it.
Safety gear
Before you start any home project, make sure you have the right protection for your eyes, ears, hands, and lungs. Safety goggles, ear plugs, heavy-duty gloves, and respirator masks will keep you safe while you’re DIYing.
Nice to haves
Though these items might not be considered essential, you never know when you might need a headlamp or flashlight, hand saw, stud finder, duct tape, or wood glue. You won’t regret keeping them on hand.
Benefits, Risks and Things to Consider Before You Add an Accessory Dwelling Unit to Your Home

Have you ever rented the unit in someone’s basement? Maybe your spouse’s mother moved into your “Mother-In-Law Unit” above your garage? Or have you ever travelled and stayed in a pool house for your stay? Commonly referred to as “Mother-In-Law” units, homeowners use these as a way to fill the space in their home and gain residual income, either from vacationers or long-term tenants.
A Guide to Permits and Regulations for ADUs, Sheds, & More
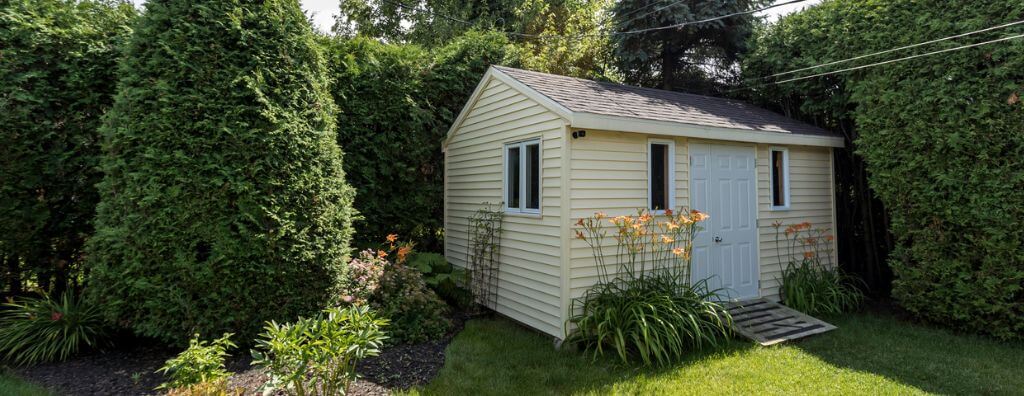
The desire to maximize property value among homeowners is stronger now than ever. As the movement of short-term rentals, turnkey properties, and real estate investment continue to grow in popularity, it’s worth it to take a moment and understand the regulations that dictate a property’s potential. Understanding a bit more about the process for obtaining the necessary permits to build structures on your property will help you avoid getting bogged down in legalities when trying to complete these projects.
Do I need a permit to build an ADU?
Accessory Dwelling Units (ADUs) and other additional property structures have emerged as viable options for homeowners looking to maximize their property’s potential. These structures offer additional living space while creating opportunities to generate extra income or accommodate multigenerational family members. But before you break ground on your building project, here are some of the things you should keep in mind.
- Permits and Regulations: No matter where you live, it is necessary to obtain the appropriate permit before you begin the construction process. Permits ensure that your project complies with local building codes and regulations. Though some guidelines are universal, keep in mind that every local area has its own specific building requirements for residential properties.
- Code Compliance: Building codes aren’t just red tape for the sake of red tape; they exist to make sure that all buildings are safe. Whether you’re building the structures on your property DIY or hiring a professional to do the job, you are the one kickstarting the project, not your local municipality. But by having these codes in place, they can ensure that you’re adhering to the required standards of safety. Before you even start on your project, familiarize yourself with your local codes and regulations. Contact your local zoning department or building authority to learn more.
- Applying for a Permit: The permit application process varies by location. Typically, you’re required to submit detailed plans for your project with documents that outline its scope, size, etc. Whether you submit architectural drawings, engineering plans, or some other form of detailed blueprint, be prepared for a thorough review on behalf of your local authority to make sure your project complies with the rules.
Whatever project you have in mind—ADU, garden shed, pool house—it’s important to become well-versed in the permits and regulations that will allow you to get it built hassle-free. Consult with local authorities to get the full picture of what’s required from you. Once you’ve checked all the boxes, you’ll be well on your way to maximizing the value of your property. Pair your building project with these design ideas to take your backyard to the next level:
5 Design Ideas to Improve Your Backyard
Featured Image Source: Getty Images – Image Credit: Onfokus
DIY Projects: How to Install Patio Pavers
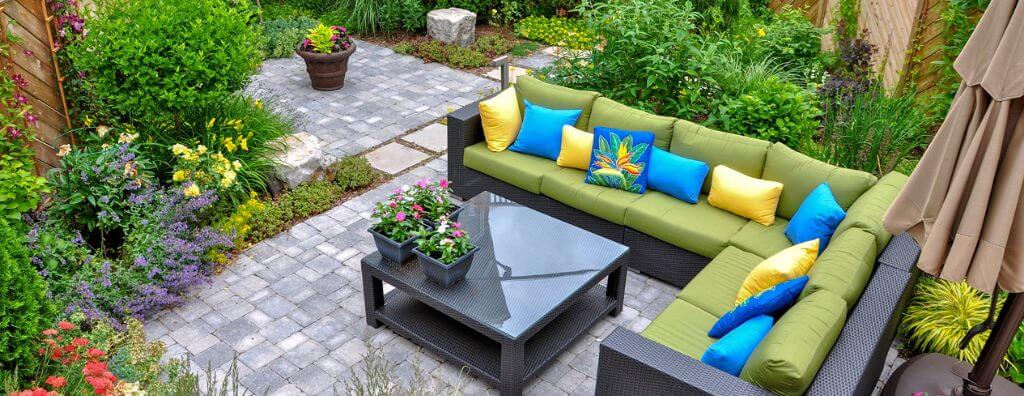
Homeowners are often on the lookout for DIY projects that are fun, simple, and boost curb appeal. Patio pavers create a focal point in the backyard. They set the stage for get-togethers and will give you endless ideas for different ways to entertain your family and friends. With a little planning and a few trips to the hardware store, a new patio can give your outdoor space a landscaping makeover.
How to Install Patio Pavers
A paver patio is a great way to unlock your inner landscape architect. It can handle heavy foot traffic and gives your backyard a refined, organized look that gives you a dedicated space to relax. This is a DIY home project that can be completed over the course of a weekend, but given its physical demands, you may want to spread the work out over multiple days.
Materials Needed
Your patio measurements will determine the amount of material you need to purchase. Once you’ve calculated your patio’s square footage, you’re ready to hit the hardware store. You’ll need to buy the pavers themselves, a paver base and sand for the bottom layers of your patio, plus additional paver sand to fill in the gaps once the pavers are set in place (like grout). You’ll also need to consider how you want to set the edge of your patio, which can be done with concrete or a metal or plastic edging to secure the pattern of the pavers. In terms of tools, you’ll need common toolbox tools (tape measure, shovel, level, broom, hammer, garden hoe, rake) plus job-specific tools like a tamper, chisel, stakes, and a wheelbarrow.
DIY Projects: Patio Pavers
To avoid running into problems during the project, check with a local professional that you won’t hit any lines buried in your backyard when you start digging. You’ll also want to make sure that your plans are in line with local code regulations and check whether a permit is required before you break ground.
- Once you’ve measured your patio, plant stakes in the corners and wrap the stakes with string to frame the shape. Use your digging tools to create a level, excavated area for your patio. Most pavers are between 2 and 3 inches thick, so you need to dig down 7 inches or more, depending on how much gravel base you plan to use.
- Add 4 inches of paver base, getting it slightly wet to make it more compact. Solidify and level the base with a tamper tool, then add a 1-inch layer of paver sand. Once the area is level, you’re ready to add your paver stones.
- Configure your paver pattern one stone at a time. Once you make it to the final pieces, there will likely be some overlap with your borders. Use a hammer and chisel to cut the final stones down to size or consider renting a masonry saw.
- Stake your edging to create a solid border for your patio. This ensures that the pavers stay fixed in place over time.
- Fill the gaps with paver sand, using a broom and/or leaf blower to make sure all the sand gets wedged into the joints. Then, add water to activate the paver sand and wait for it to set completely per manufacturer instructions.
Once your paver patio is complete, it’s time to sit back, relax, and enjoy your backyard’s new centerpiece! For more DIY projects and backyard makeover tips, read the following blog post:
5 Design Projects to Improve Your Backyard
Featured Image Source: Getty Images – Image Credit: Joanne Dale
The Benefits of Adding a Catio to Your Home

Cat owners are often faced with many considerations as they fill their homes with toys and cat trees to appease the kings and queens of the household. One such consideration is how to best use the space. Adding a catio to your home will help keep your cat entertained and safe and can be easily customized to fit the needs of any living space.
The Benefits of Adding a Catio to Your Home
A catio can offer a wide range of benefits for you and your cat, including daily enrichment opportunities. Catios provide easy access to the outdoors where they can stimulate their senses. By providing this connection to the outside world, cats can independently spend their days as they please with a wide variety of options to choose from.
Catios also keep your feline friends safe from the dangers that lurk outside. While they’re able to enjoy the outdoors, the enclosed space keeps them nearby while keeping predators out. This prevents accidents with cars on a busy street and run-ins with potentially harmful animals found in residential areas such as raccoons, and in certain areas, coyotes. It also keeps out other cats, preventing exposure to diseases and accidental pregnancies.

Image Source: Getty Images – Image Credit: ahloch
In addition to the benefits catios provide for your furry friend, you will also improve the livability of your home by reducing the damage to your furniture and rugs or carpet. When your cats can enjoy that space, they are less likely to exert their pent-up energy on your carpeted and upholstered pieces.
For those cats who act on their hunting instincts, a catio is also a great way to keep local wildlife out of your home. From their perch in their enclosure, they will get to smell and watch birds, mice, and rabbits, but they won’t have the opportunity to hunt them. Saving these lives helps your neighborhood’s ecosystem and saves you from having to clean up the mess afterwards.
Providing a litter box outside can also improve your indoor air quality by reducing smells, chemicals, and bacteria associated with cat litter. Of course, it’s not wise to replace an indoor litter box with an outdoor one, but by adding another one that’s nearby, your cat will use the indoor box less.
What Can You Do with a Catio?
The simple answer: anything you want. Catios are customizable for your space and your cat’s interests. Answering these two questions will help you start the process of designing or choosing a design to build.
- How much space can you offer to the enclosure?
- How will the cat(s) enter the enclosure from the house?
You may also want to consider what kind of exposure to the elements you’re comfortable with, whether it’s open air or if you need a little more protection from the elements with a solid exterior. While in some areas wire fencing might be all that’s needed, regions with harsher climates may require a more robust setup, such as insulated windows.
Catio Options
If you have a smaller space, you may consider a catio attached to a window, which won’t take up any additional square footage. Much like a garden box, you can attach a small shelf-like enclosure just outside your window and stretch it as far out as desired. The entry point can be the window, making it easy to open and close.

Image Source: Shutterstock – Image Credit: SvetMedvedeva

Image Source: Getty Images – Image Credit: ahloch
If you have a yard, you can give your cat a tunnel. A simple addition to the home, attach an elongated box that juts out into the yard for your cat to explore and get a 360-degree view of the elements. You can attach this to an existing cat door or add a cat door on an exterior wall.
For those with a larger space, or if you already have a patio set up, you can build out a catio like an extension on your home. Attach the large enclosure to the exterior and use either a window or cat door for entry. Use the structure to offer a multitude of options on the outermost walls, like shelves, ramps, and hammocks. Customize it with your cat’s favorite things, like scratching posts and pet-safe plants. You can even add a chair for yourself in there if you want!
For more ideas on caring for your pets, home maintenance, and more, visit the Living category of our blog:
Featured Image Source: Getty Images – Image Credit: Moyo Studio
Remodeling Projects to Avoid When Selling Your Home

It’s common for homeowners to feel compelled to remodel their homes before they sell. Renovating the spaces in your home can increase its value and help you compete with comparable listings in your area. However, some remodeling projects are more beneficial than others as you prepare to sell your home. Always talk to your agent to determine which projects are most appealing to buyers in your area.
Remodeling Projects to Avoid When Selling Your Home
When preparing to sell your home, you want to strike the right balance of upgrades. Making repairs and executing renovations will attract buyer interest, but you don’t want to dump so much cash into remodeling that you won’t be able to recoup those expenses when your home sells.
So, how do you know where to focus your efforts? Your agent is a vital resource in understanding your specific situation and will offer guidance on your remodeling efforts to sell your home for the best price. Here are a few projects sellers will want to keep off their to-do lists for the best return on investment.

Image Source: Getty Images – Image Credit: skynesher
Minor Cosmetic Upgrades
Whether you’ve made small cosmetic upgrades throughout your home typically isn’t a make-or-break proposition for most buyers. Let’s say you’re questioning whether to invest in a new toilet, vanity, and shower for your primary bathroom before selling. Unless these appliances are damaged and you can repair them without spending too much, it’s okay to sell as is.
Major Upgrades with Long Timelines
For any remodeling project, your agent’s analysis will help you determine its risk/reward potential. This dynamic is heightened with major remodeling projects and home upgrades, due to their higher costs. Four of the six lowest ROI remodeling projects found in the Remodeling 2022 Cost vs. Value Report (www.costvsvalue.com)1 are upscale or major upgrades, all with roughly a 50% return on investment.
These projects come with hefty price tags and longer timelines than minor repairs and upgrades, which can complicate factors as you prepare to sell, especially if you have a deadline to get into your new home. They have the potential to temporarily displace you from the property, meaning you and your household may have to find somewhere else to stay until the project is complete.
- The Bottom Line: To go through with a major home upgrade before you sell, its schedule must fit with your moving timeline. It should also align with buyer interest in your local market. If the project doesn’t meet these criteria, it should be avoided.
Building Code Violations
The rules dictating whether you can sell your home with building code violations vary region to region. It also depends on what the building code violation is and whether neglecting to update it is deemed a safety hazard. The buyer’s mortgage lender may also have stipulations saying that the loan may not be used to purchase a home with certain features that aren’t up to code, which could lead to them backing out of the deal.
If you’re selling an older home, you’re not obligated to update every feature that may be out of code to fit modern standards. These projects are often structural and require a significant investment. If the violation in question was built to code according to the regulations at the time, then a grandfather clause typically applies. However, you’ll need to disclose these features to the buyer.
Trendy Makeovers and Upgrades
Lastly, it’s best to avoid remodeling projects that target a specific trend in home design. Trends come and go. Timeless design is a hallmark of marketable homes because it appeals to the widest possible pool of buyers. Keep this in mind when staging your home as well. Creating an environment that’s universally appealing and depersonalized allows buyers to more easily imagine the home as their own.
Learn more about remodeling your home as you prepare to sell here:
Should I Remodel or Sell My Home As Is?
1: © 2022 Zonda Media, a Delaware Corporation. Complete data from the Remodeling 2022 Cost vs. Value Report can be downloaded free at www.costvsvalue.com.
Featured Image Source: Getty Images – Image Credit: eclipse_images
Setting Up Your Home Gym

As the stay-at-home hours add up, setting up a home gym is not only physically beneficial, but can bring some added mental wellness to the new normal many of us find ourselves in.
9 Summer DIY Projects
When home-project lists pile up, it can leave some homeowners feeling overwhelmed by their to-dos. One helpful strategy is to prioritize your projects by season. The following list of simple and cost-effective summer projects will help make the most of your summer at home while preparing for the seasons ahead.
9 Summer DIY Projects
1. Organize a Garage/Yard Sale
No summer project list would be complete without a task to sift through your home’s clutter and organize a garage or yard sale. While you’re compiling items to be sold, identify which items can be donated to declutter your home most effectively.
2. Upgrade Your Front Porch
Your home’s front porch can make a lasting impression. Make a statement with a boldly colored front door, look for stylish house numbers, and add classic front porch elements like a sitting bench or swing for ultimate comfort.
3. Fix Up Your Fence
Whether your fence needs a simple wash, a new sealant or stain, or structural repair, summer is high time to get this work done and extend the life of your fence. Power washers are a helpful tool in getting your fence clean before re-staining. Let the fence dry for one to two days before applying the stain.
4. Build a Firewood Shed
It’s best to prepare for winter ahead of time. In summer, conditions are perfect to build a firewood shed to keep your firewood dry throughout the fall and winter. Build a simple enclosure with an open front. This lets air pass through easily, drying the wood quickly.
5. Repaint Kitchen Cabinets
A fitting summer project in the kitchen, repainting your cabinets brings new life into the space without the hefty price tag of a full-scale renovation. For a complete refresh, repaint the hardware too, or replace them to match the new cabinet color. These Simple Kitchen Makeover Ideas can make a noticeable difference in the heart of your home.
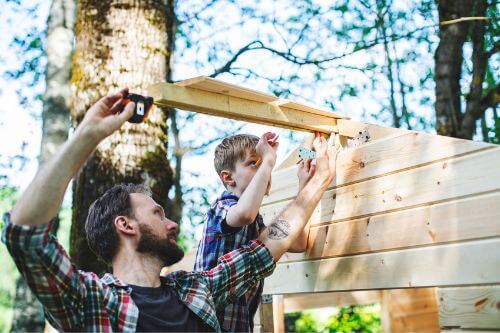
Image Source: Getty Images – Image Credit: JulPo
6. Exterior Painting
Giving the outside of your home a fresh coat of paint does wonders for its curb appeal. Summer is a great time to get outside and paint, as the chances for rain are lower than other seasons. Although an exterior paint job is DIY-eligible, it can be a time-consuming task that some homeowners may not have the bandwidth to complete. If you need to hire a professional to handle the exterior repainting, consider focusing your DIY painting efforts elsewhere (trim, fencing, indoors).
7. Build a Fire Pit
A new fire pit may be just what your backyard needs to maximize your summer at home. Common fire pit materials include brick, stone, and cinder blocks. Outline your fire pit before you start digging. Once the hole is dug six to eight inches deep, fill in the hole with gravel until it is level with the ground. Choose your materials, fix the stones into the ground, compact them together, and enjoy nights by the fire under the stars. Check for local digging regulations and burn bans.
8. Install a Window Air Conditioner
Depending on your local climate, the hottest time of year is either already here or fast approaching. Install a window AC unit to enjoy the time you spend indoors comfortably. Installation is typically a two-person job, so be sure to have help ready when it comes time to install.
9. Insulate Your Basement/Crawl Space
Although not the most glamorous of all summer projects, taking time to insulate your basement or crawl space during summer will pay off come winter. Because it may take multiple trips to properly install the insulation, the summer weather makes for more ideal conditions to accomplish the task.
For more helpful info on home improvement DIY projects you can accomplish this summer, check out these 5 Design Projects to Improve Your Backyard.
Featured Image Source: Getty Images – Image Credit: sanjeri
What is a Barndominium?

What is a Barndominium?
A barndominium is a combination of a barn and condominium and is typically custom built from metal pole barns or other similar structures. Due to the metal structuring, barndominiums require less maintenance than a traditional home. They are also less susceptible to deterioration and damage. The popularity of barndominiums has taken off in recent years due to their multi-functionality as a home, a workspace, a shop, etc. Designs can range from one-story steel structures to contemporary barn homes. Chip and Joanna Gaines from HGTV’s “Fixer Upper”, aired an episode about barndominiums in which they converted a barn with horse stalls and hay storage into a stunning five-bedroom, two-bath home.
Customizable
When designing a barndominium, the floor plan is very flexible. Due to their uncommon framing and design, you have carte blanche to decide which layout is ultimately best for you. Choose to have an open floor plan with designated spaces for each room, or put-up dividing walls that provide more separation. Some barndominium models include energy-efficient windows, engineered concrete slabs, spray foam insulation, plumbing, high ceilings, and much more. There are several companies that offer custom barn home kits which include both the plans and building materials.
Affordable
Inevitably, the cost of building your barndominium will increase depending on the materials and the complexity of its design. However, most barndominiums are relatively affordable to build. According to metalbuildinghomes.org, many large high-end builds begin at $250,000. Other builders will generally charge around $85 per square foot for a complete build-out. On the other hand, a basic barndominium shell with a living quarters can fetch prices as low as $20 per square foot. A basic shell would include the bones of the structure: the slab, building, plumbing, metal or wood, electrical stub outs, vents, sinks, showers, and washrooms. Due to the simplicity of construction, a barndominium can be finished in a matter of weeks. The initial purchase price and the cost of maintenance are considerably lower than a traditional single-family home. Saving money on the necessities allows you to dedicate more funds toward personalizing the space.
Multi-Purpose
Barn Pros in Monroe, Washington explains the different uses of their customizable barns. As they explain, the uses their clients have found for their barndominiums run the gamut from primary homes to yoga studios, to barns for growing plants, as animal sanctuaries, educational facilities, and wedding venues. According to Barn Pros, roughly 40 percent of clients use them for agricultural purposes. The owners of these structures say that there is something appealing about a design that can be used as a standalone home yet has the flexibility to house something more intricate like a winery or a brewery.
Check out these resources to get inspiration from some popular barndominium floor plans:
")


